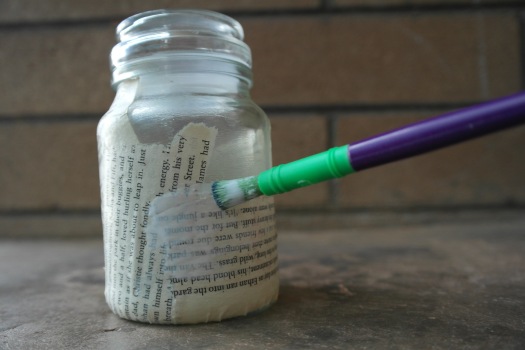
This is a quick and easy DIY that will repurpose an underated house hold object. These Bookpage Jars will look great anywhere, especially a bookshelf, and can be used for just about anything!
For this project you will need:
- Old book pages, but anything made of paper will work just as fine!
- Jars, that have been cleaned thoroughly
- Mod Podge, but PVA Glue & Water make a cheaper alternative!
- A Paintbrush
- OPTIONAL: Ribbon, Glitter or anything else imaginable to decorate the final product
Step 1: Before you can start, you will have to remove and stickers or labels from the jars. An easy way to do this is soak them in warm soapy water for a few minutes. They should slide right off!
Step 2: Tear smaller strips of paper to stick on your jar. You can be as gentle or as rough with the tearing, however each will produce a different look.
Step 3: Pick out the pieces and start to glue them to your jar. If you are creating you own mixture, use PVA glue and add a small amount of water. Mix until it has the consistency of milk, but don’t drink it no matter how appetizing it looks! Half way through I found that painting a layer on the back of the paper before applying it on the jar was much easier. It’s like having an extra hand!
Step 4: Repeat the process until the whole jar is covered. When you are satisfied, adding a layer of glue to each piece which will preserve the paper and make it look neater. Just be sure to apply the glue in the same direction, I prefer to brush it on horizontally around the jar as I found it prevents tears and holes in the paper.
Step 5: Depending on the shape of your jar you may have a curved bottom. If that occurs, just push the paper down following the shape curves. It might take a while to happen, but just be patient and reapply glue.
Step 6: Now let your baby dry for a few hours or until it’s not tacky to touch anymore.
Step 7: You have now finished you newest décor item, now place it in you house with pride!
Step 8: The next step is completely optional but you can decorate it however you want. Due to the shape of my jar the neck was messy and the pages ripped in a few places, so I fixed this by adding twine and adding a bow.
This simple DIY is not confined to jars; you can apply the same process and create anything. Let your imagination take control, and remember to have fun with it!
If you create this DIY I would love to see it! You can find me at @rachel_reads on Instagram, and as always if you have any recommendations on what I should try next time, let me know down below!


These are so creative and cute!!
LikeLike
Thank you Celina!
LikeLiked by 1 person
I badly need to create this one because all of my bookmarks are scattered on my desk! Thanks for this. xx
LikeLike
Well I’m glad to help! Can’t wait to see your final product xx
LikeLike
Omg this is amazing
LikeLiked by 1 person
Thank you so much!
LikeLike
Just followed you
LikeLiked by 1 person