
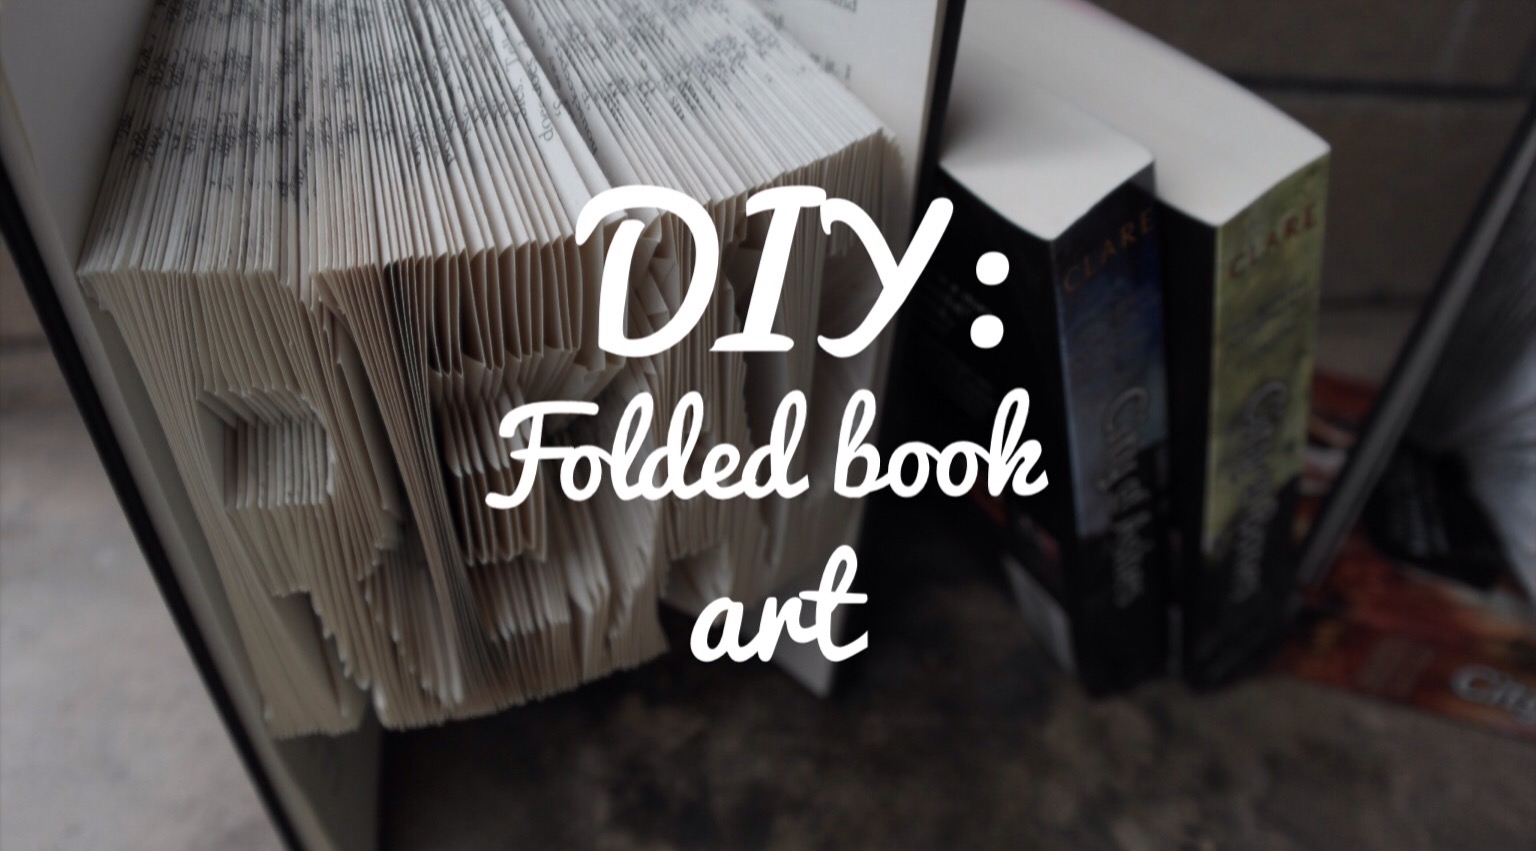
 I made one of these a few months ago and posted a photo on my Instagram, which was when a lot of people asked how I did it. So I thought that I would show you guys how to do it. This was a lot of fun do to and trust me, once you make one you will never want to stop.
For this project you will need:
- 1 hardcover book (I purchased mine from a charity store, you don’t want to destroy a brand new pretty book!)
- A ruler
- Pen or pencil
- An editing program on the computer (you can use anything from Microsoft paint to Photoshop)
- A really long playlist of your favourite music and a lot of time. This can take anywhere upwards of 3 hours depending on the intricacy of your pattern!
BEFORE YOU START: Before you even start thinking about making your pattern, you need to measure your book. You need to measure the height because depending on the program you use to make your pattern you can make the dimensions of your pattern the same as your book (on basic programs that doesn’t matter that much, but on Photoshop it will save A LOT of time later) .You also need to count the pages in your book. Now I’m not talking about the number of written pages, I’m talking about the actual number of pages in your book. You will be using the number of pages to make the pattern.
For Example: my book has 261 written pages but there is only 139 double-sided pages.

CREATING YOUR PATTERN: In this tutorial I will be using Microsoft Paint that is installed on the majority of computers, due to the fact that a lot of people will have it. If you are using a different program use the same basic idea.
1. Choose your design. You can make pretty much any pattern thinkable, let your imagination run wild! I found a photo off of the internet that I thought would be perfect. I uploaded it onto my program and made it Black and White, I coloured the entire picture black and white because there was originally a few grey pixels, to make it easier later. You will also need to put on the grid, it is essential you have the straight lines to follow.  2. Adding lines. It is important that your pattern has less rows across than pages in your book, because each column represents a page to fold. Now we are going to add the stripes. Depending on the pattern you choose, you may have sections with two or more levels in a column.
 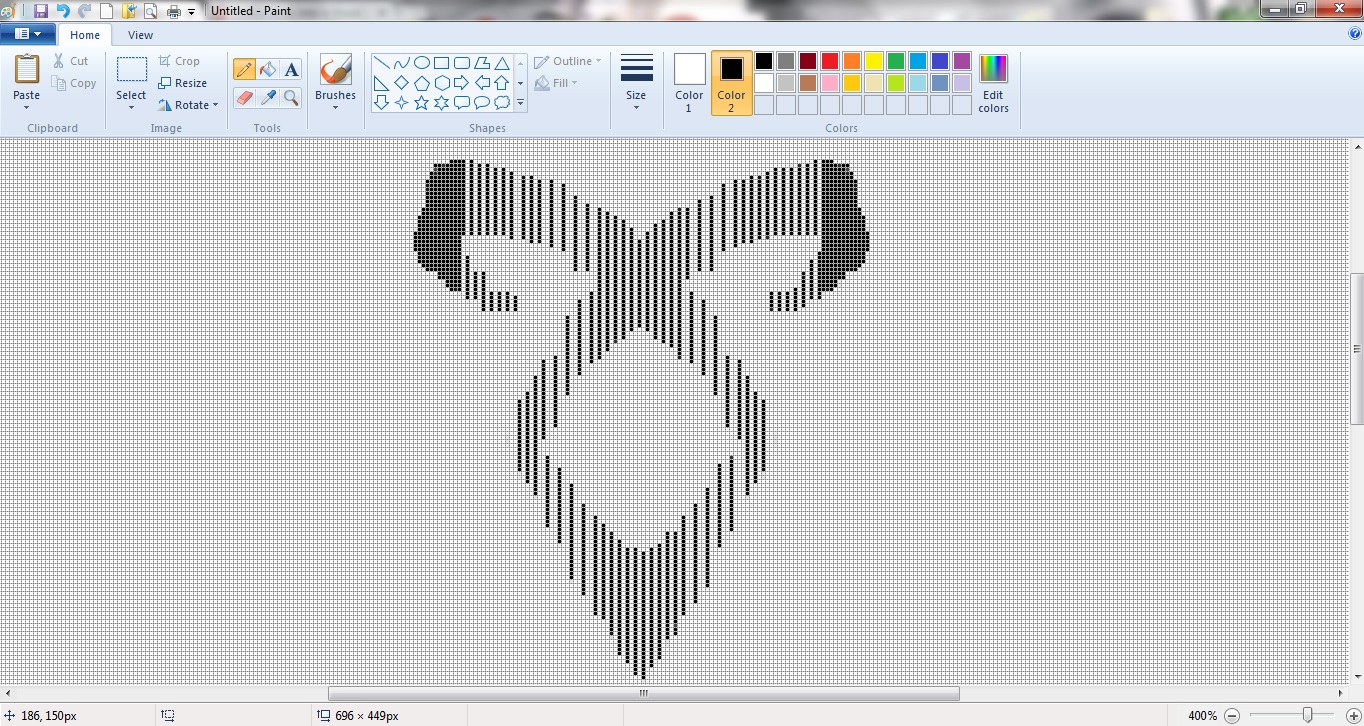 In these sections, you will have to add white lines in an alternating pattern. This means you add a white line in level 1 then add one in level 2 in the next column, this is to add ‘hollow’ sections .
3. Finalising your pattern. now that you have added your white lines your pattern will look a little something like this. Now your pattern in finished! you can print it off and now start folding
FOLDING YOUR BOOK!: When folding your pages it is ESSENTIAL that you only fold on the black lines, if not your pattern will mess up completely.
4. Preparing your folding. Before you start on your magical folding adventure, have to make a slight mark on the top and bottom of your book, this is your indicator to where to start and end your folds. You might also want to ‘center’ your pattern. This is so when you are finished there is an even amount of pages left on either side for your masterpiece. This is not necessary, but I am a perfectionist so it is essential to me, you could just estimate. Now that is done you can start folding! Create a small fold at the top of your piece of paper with the pattern, this is so the pattern can slip onto the pages and stay there. Once you have a STRAIGHT fold (very important it isn’t wonky) slip it onto the 2nd page and place the 1st page back on top, I know this sounds weird but just stick with me! 5. Creating your first fold! now you have that done, you can FINALLY start folding your first page! Line your 1st page up with the first black column, and with a ruler make a straight line from the mark on your pages you made before to the top of the black column. Now fold along that line, and do the same with the bottom. Make a straight line from the mark on your pages you made before and to the bottom of your black column. If you make a mistake you simply unfold and repeat the process, you wont notice it when its finished.
  You completed your first fold, Congratulations! now you simply repeat the process until your pattern is completed. Remember you on fold on the Black lines and make your folds crisp and straight.
6. The final product! Now that you are done, put it on display proudly and make sure you show everyone and tell them you made it by hand! 
So that’s the Tutorial to make your very own and unique folded book art. If you have an questions at all just leave a comment below, and I will do my best to help you! I would love to see the final product if any of you guys try this.

This is amazing! *o* will make sure to try it out!
LikeLike
I can’t wait to see it!
LikeLike
Definitely going to make one of these soon!
LikeLike
Oh yay! I’m so excited to see it
LikeLike
I’ve been excited to make my own ever since you mentioned it was possible, great post! ❤
LikeLike
Wow this is so helpful! Definitely going to try this one soon.
LikeLike
I can’t wait to see it!
LikeLiked by 1 person
Reblogged this on kpopandbooks.
LikeLike
Please can you tell me how to change the gridlines so they are smaller, mine makes my image so small it all fits in one box :’-(
LikeLike
Sadly you can’t make the gridlines smaller, you will have to make your pattern bigger. You do this by selecting the ‘Square Selection Tool’ from the tool bar. Select the entire pattern then stretch it bigger until the desired size is reached.
Hope this helped 🙂
LikeLike
So The white lunes? I have to fold them? Oro just The black lines?
LikeLiked by 1 person
You only fold on the black lines 🙂
LikeLike
Hi, I’ve been giving your tutorial a go, which is fantastic by the way! But, I have a few questions and if you could help I would greatly appreciate it!! Firstly how do you put in the white lines, and how do you print your zoomed in image, when I print mine it prints regular size and without the grid? Thanks so much, Maoliosa
LikeLiked by 1 person
Hey Maoliosa, and thank you so much for the kind words!
Firstly, to add the lines to the image I used the ‘Line’ tool with the smallest possible thickness/size to ensure the final piece had the most detail possible. You could also use a regular brush in the smallest size, but it is much more time consuming and a lot harder to produce straight lines.
Secondly, to keep the graph on the image I took a screenshot of the final picture (with the lines finished and graph still turned on) and pasted it into a word document to alter the size of the image. You can make it smaller or larger before printing.
I hope this helped you out, but if you have any other questions, don’t be afraid to ask 🙂
LikeLike